


Again, this is the completion.
Prepare these below.
- fabric (cotton or silk would be the best for your skin) what so ever but no stretch material, it even OK your useless shirt, blouse or whatever garments.
- steam iron or no steam iron with a glass of water
- ironing board
- sewing machine or hand sewing kit and pins
- fabric scissors
- a bodkin or a safety pin
- a face towel (the size is about 80 x 30 cm )
- a ruler
I have one blouse never wear again and cut its sleeves both with my fabric scissors. Get ironing on them to make it flat.


Layout your fabric double. The right side faces another's the right side.


Check your sewing machine before the start to sew!

We are going to make these above first. The process is below.

Find the best match thread's colour for your fabric. Polyester thinner thread is normally used for machine sewing. If you do hand -stitch, take a thinner one than the thread for large buttons.

Find the best match thread's colour for your fabric. Polyester thinner thread is normally used for machine sewing. If you do hand -stitch, take a thinner one than the thread for large buttons.

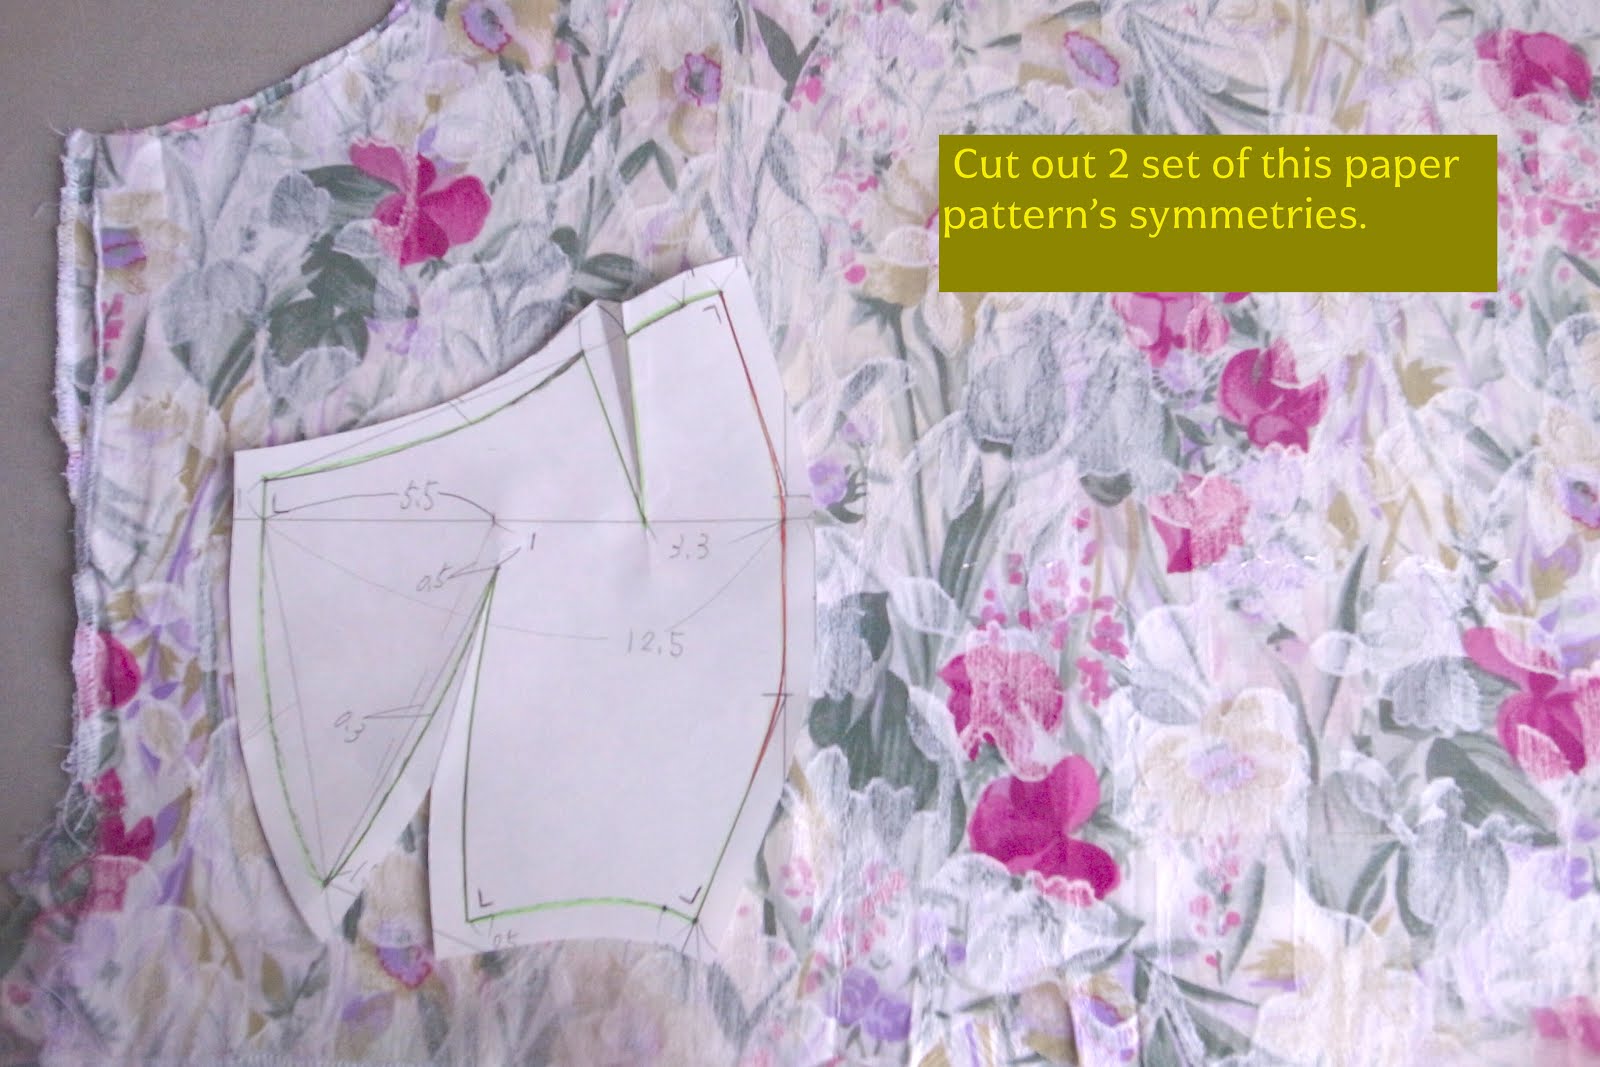
Lay double and stitch this line, it is the centre of symmetry.

Did you do like above?
We are going to the ironing, so, prepare a face towel.


Bind the towel twice. Do not too tight.

Every dart and the centre line have to be turned by iron.
- `Turned steam off first, if yours is steam iron. It because your finger burned possibly.
- Cover the towel with a part of the mask, it looks like above.
- Dip your finger into the water and put it right on the line you sewed.
- Then, turn the darts with a dry- iron as making sure with your finger.

The right one becomes outside when you wear.
The left one faces directly to your mouse.
Decide which one goes the out or the mouth, then turn every dart carefully with a dry- iron.


We are going to make this. The process is right below.


Open the seams. Wet the seam lines by your finger with some water. And make them flat with an iron.
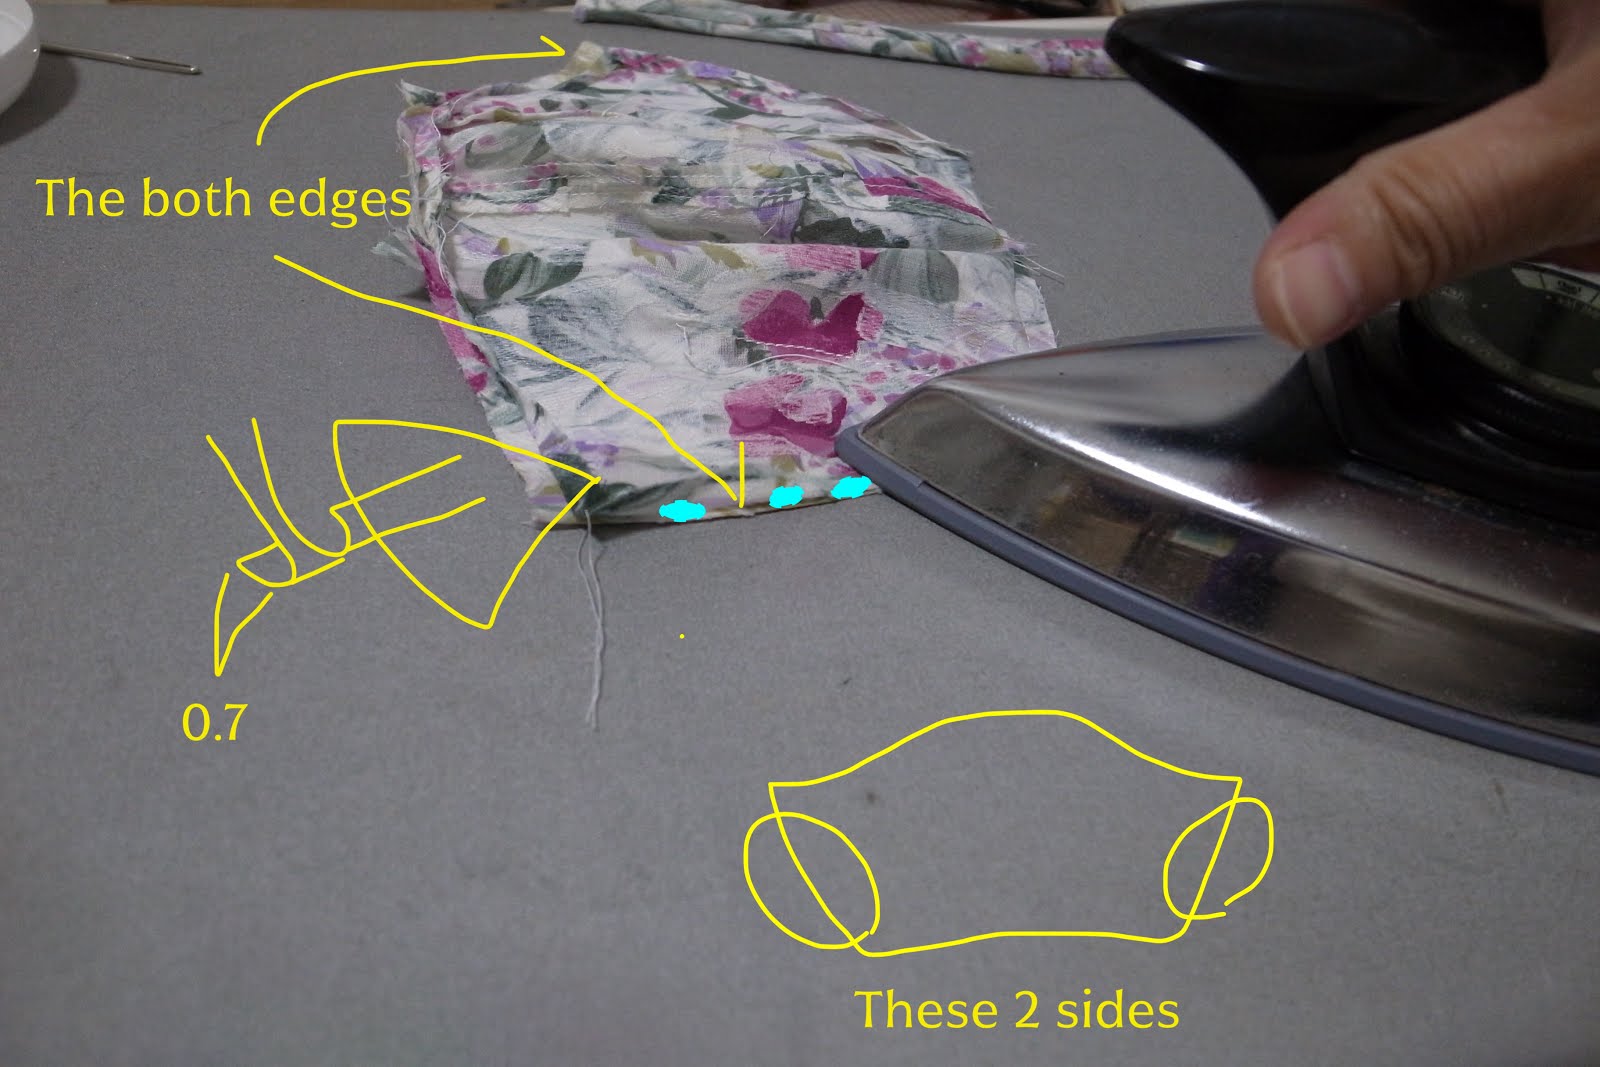
Also, both 2 edges like above.
And make it inside out!
Then, you will see this below.

All seams get inside now.

We are going to sew 2 pipes. Before the start, set your sewing machine's dial 1mm or shorter than 2mm.


Do not take ironing on them at this point! (if do so, it gets uneasy to do the next process!)

Use a bodkin or a safety pin to pull the inside out.

A quick check to know the certain length for the person who wears this. Pin those pipes on the mask and make sure the comfortability. Try it on and measure both lengths.

For example, mine was 15cm, which nicely fit my face.
It gets shorter than now after washing. Plus 0.5 cm or a little more ( + about 3-4%) to your certain length.

Again Set your sewing machine dial 2 mm!!

Have you done everything?
You achieved all.


Tell your friends how to make and show off the mask you made!!